APPS
Events Manager
 Visit the Events Manager by selecting it in the app menu or by visiting the Dashboard and selecting it there.
- Contact info
- Location
- Meta info
- Duplicating/repeating events
- Event schedule
- Social sharing
- Event tags
Adding events to a content block
HOME PAGE
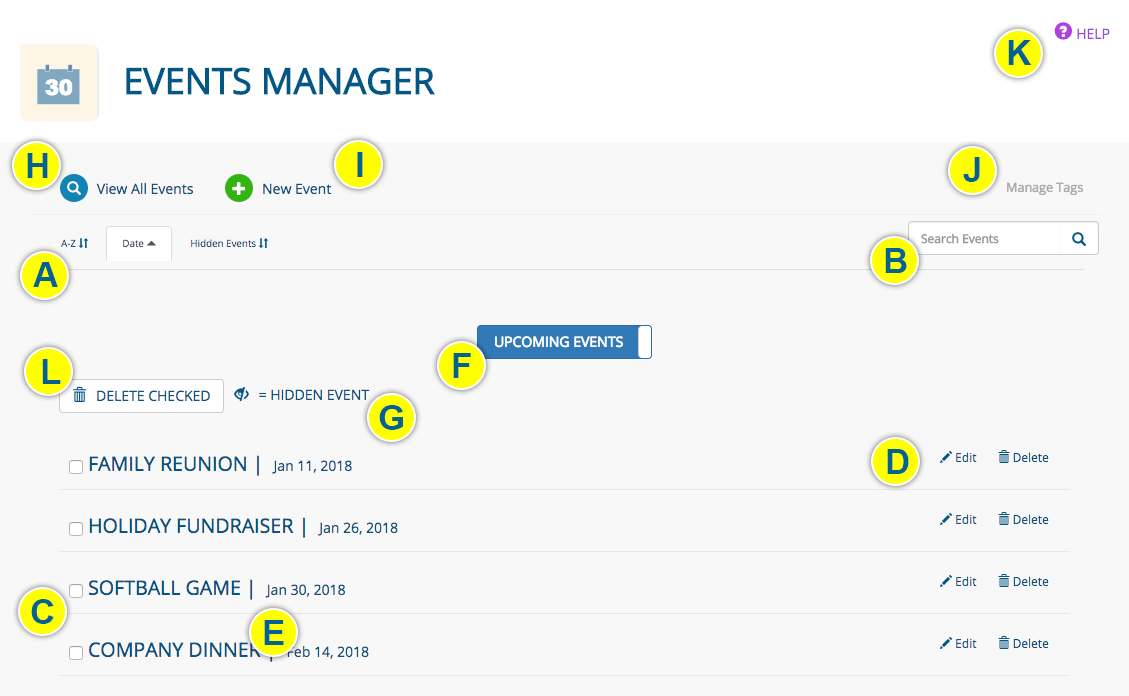
- The Events Manager home page contains a list of all of your events, which you can sort (A) and search (B). (The default sort is by date.)
- Each listing (C) tells you the date of the event
- Edit or delete an event with the icons (D) at the far right. You also can edit an event by clicking its title (E).
- Switch between upcoming events and past events (F) by toggling between the two
- The HIDDEN EVENT icon (G) indicates an event that has been hidden from public view on your website
- Return to this page by clicking VIEW ALL EVENTS (H) from any page within the app.
- Get started on a NEW EVENT (I)
- Create, edit and delete tags (J)
- Read documentation on the Events Manager app (K)
- Select the box to the left of each event you would like to delete, then click DELETE CHECKED (L)
New event
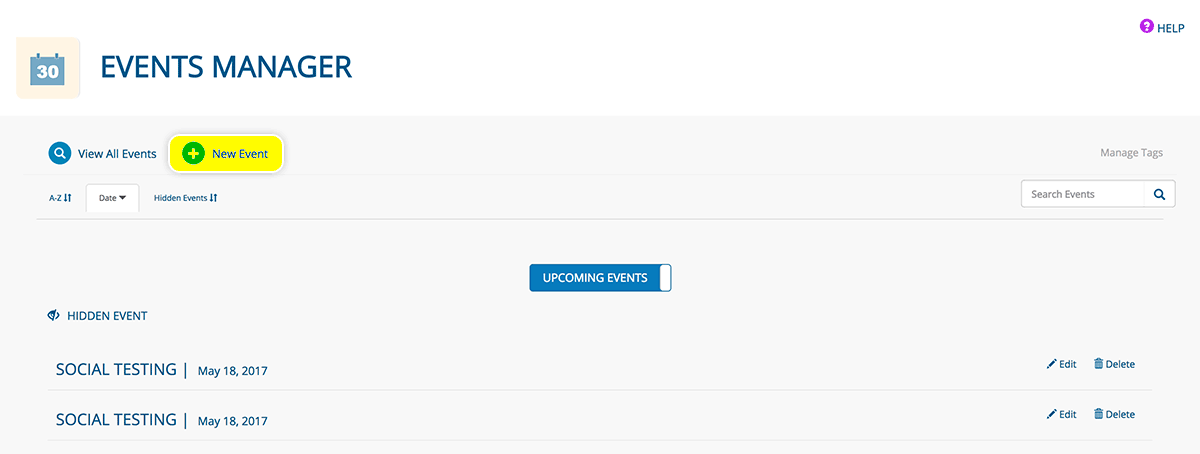
- Click NEW EVENT from any page in the Events Manager app.
CREATING/EDITING EVENTS
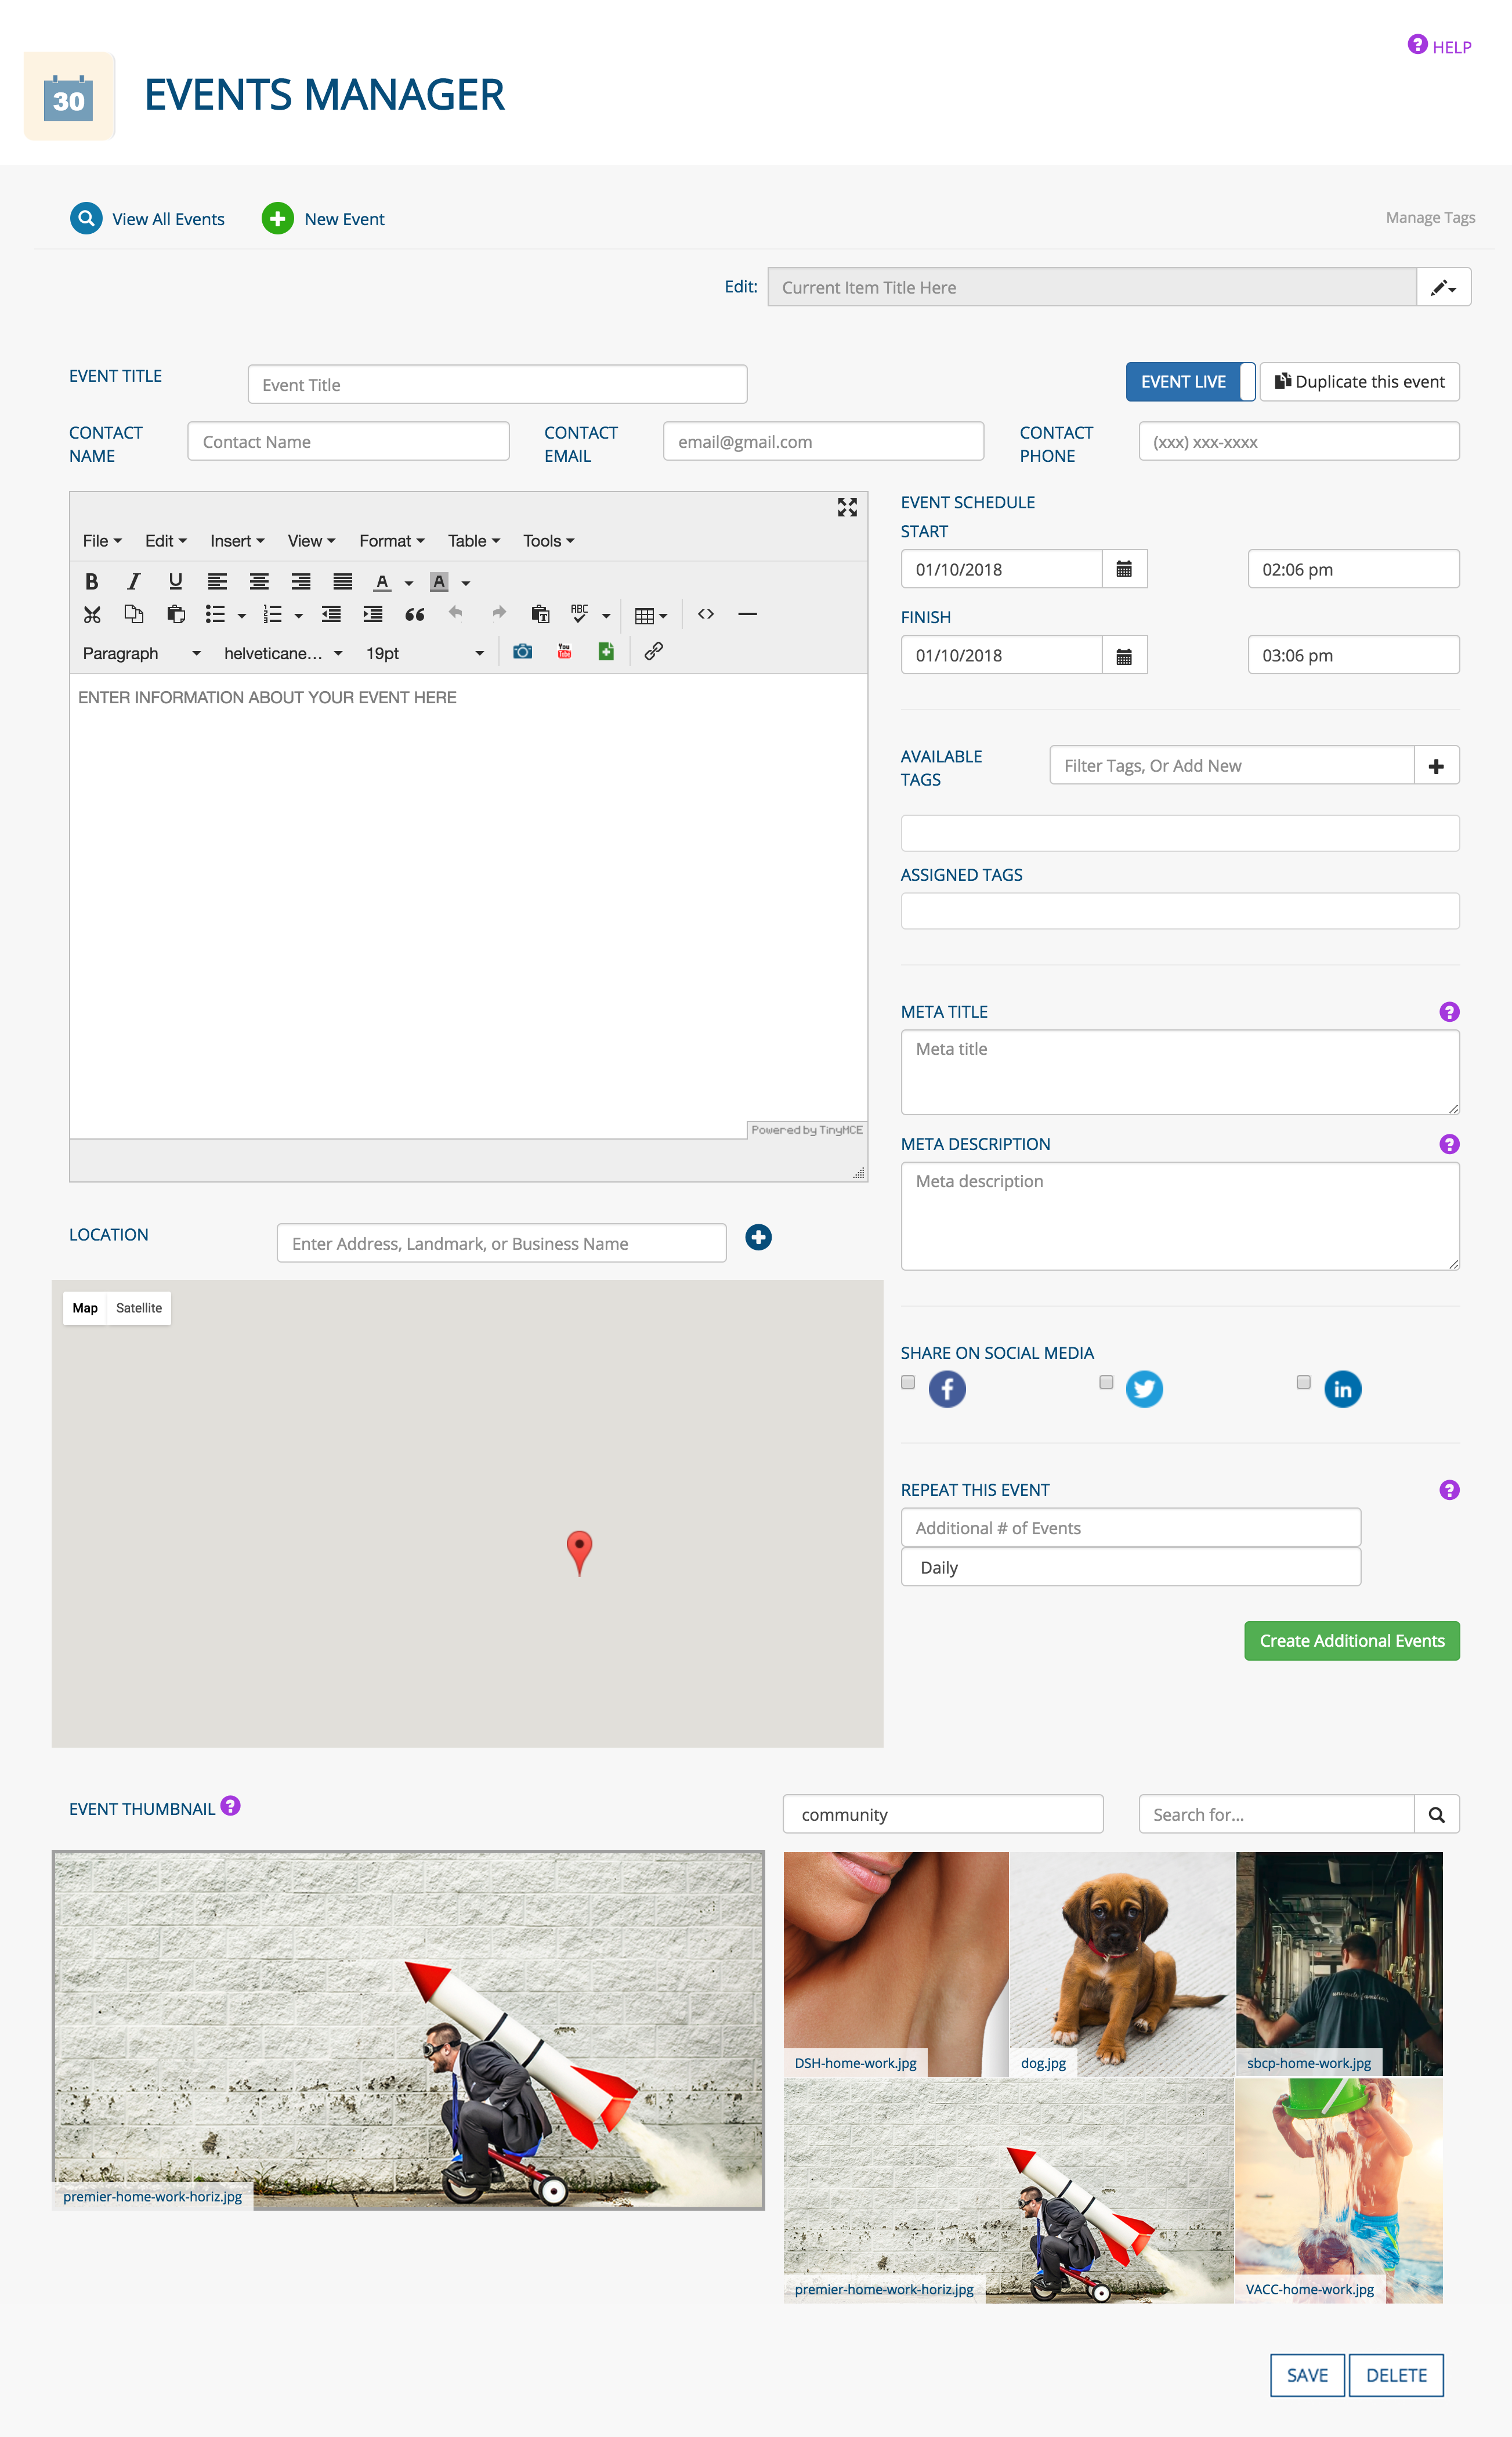
- Enter the EVENT TITLE, which will serve as the URL of the event page.
- Keep the EVENT LIVE slider in its default position to publish your event. Click it to hide the event from public view.

- Click DUPLICATE THIS EVENT to create an exact replica of this event (you must save your event before making a duplicate of it). Duplicated events will appear on the Events Manager home page.

- Enter the CONTACT NAME, CONTACT EMAIL and CONTACT PHONE of the person users should contact if they have questions about the event
- Add event details in the page editor
- Enter a LOCATION for the event then click the blue + icon
- Set the EVENT SCHEDULE. The FINISH date must on the same day or after the START date. The finish time indicates when the event will be taken down from your website. If your event has an actual finish time, you should include it with the rest of the event details in the page editor.
- Click a tag in the AVAILABLE TAGS field to assign it to the event. Click a tag in the APPLIED TAGS field to unassign it.
- In the FILTER TAGS, OR ADD NEW field, start typing to filter tags in the AVAILABLE TAGS FIELD. Type a tag title then click the + icon to add a new tag. ABOUT TAGS
- Enter a META TITLE and META DESCRIPTION. A well-written meta title will help boost the event page's SEO, while a sound meta description can entice a user to visit the page to read about the event. LEARN MORE
- Click the appropriate checkbox(es) to share your event on your social media platforms

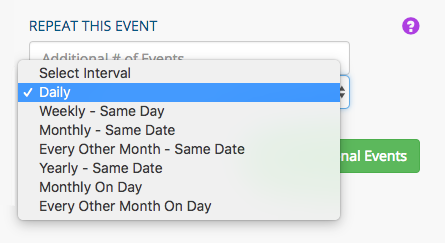
- To REPEAT THIS EVENT, enter the ADDITIONAL # OF EVENTS you want to create then select the time parameter from the dropdown menu. Replicas of this event will be created on the specified dates and will be found on the Events Manager home page. (You must save your event before choosing to repeat it.)
- Choose an EVENT THUMBNAIL. This is the image that will be used when users share this event on social media. It also will be used if you opt to show images with event summaries.
- Select the appropriate folder from the dropdown menu that contains an image that represents this event.
- Click the image to apply it. (Only one image can be used)
- Click the SAVE button when you are finished creating/editing your event, or the DELETE button to delete it.
NAVIGATING AMONG EVENTS
- Every event page contains a dropdown menu for easy access to other events

CREATING/DELETING TAGS
- Click the MANAGE TAGS button from any page in the Events Manager app
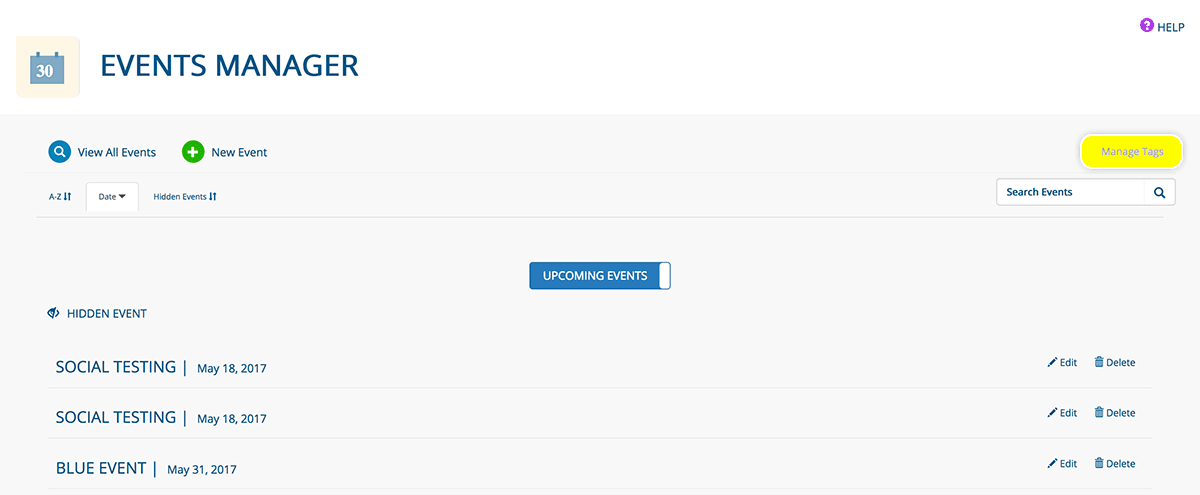
- In the FILTER TAGS, OR ADD NEW field, start typing to filter tags. Type a tag title then click the + icon to add a new tag.
- Click a red 'x' to delete a tag ABOUT TAGS

ADDING EVENTS TO A CONTENT BLOCK
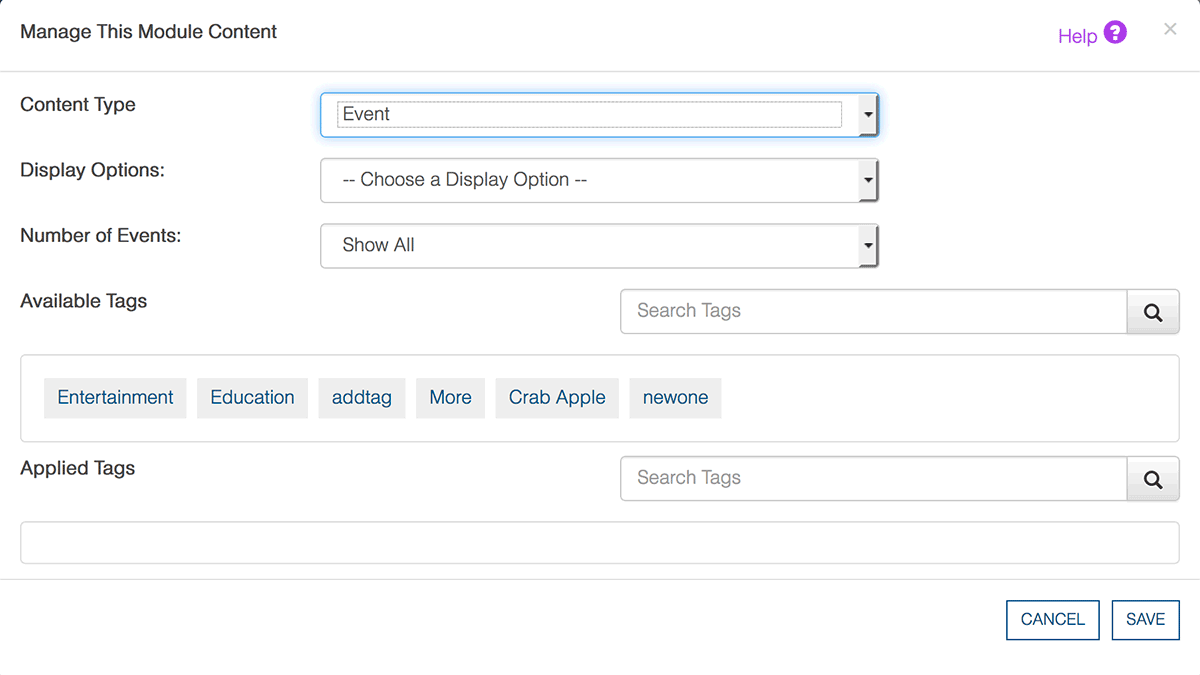
- Click the module icon from a content block (if the content block doesn’t have a module icon, CONTACT US)
- Choose EVENT from the CONTENT TYPE dropdown menu
- Choose "Accordion Dropdown", "Calendar" or "Listing" from the DISPLAY OPTIONS dropdown menu
- Choose a number from the NUMBER OF EVENTS dropdown menu
- If you have selected the "Listing" display option, check the "Show event thumbnails" checkbox to show an image with each event summary
- Click a tag in the AVAILABLE TAGS field to assign it; it will move to the APPLIED FIELDS field. Click a tag in the APPLIED TAGS field to unassign it. (Tags are optional; assign no tags if you want to show all events. LEARN MORE about tags.)
- Click the SAVE button (click the CANCEL button to return to the page you are working on without making any changes)
- The content block will now contain the event(s)
MANAGING EVENT SETTINGS
- Click either the pencil icon or the module icon of the content block that contains events
- You will be taken to the Module Manager, where you can edit the settings
Was this page helpful? Leave your comments below.
comments powered by Disqus