APPS
Inventory Manager
 Visit the Inventory Manager app by selecting it in the app menu or by visiting the Dashboard and selecting it there.
The Inventory Manager is a robust app with a variety of features. It is possible that your inventory set-up does not require all of the available features, meaning that not all of the following documentation applies to your set-up.
Creating/editing inventory items
- Item info (SKU, meta, categories)
- Images
- Prices
- Options
- Tags
HOME PAGE
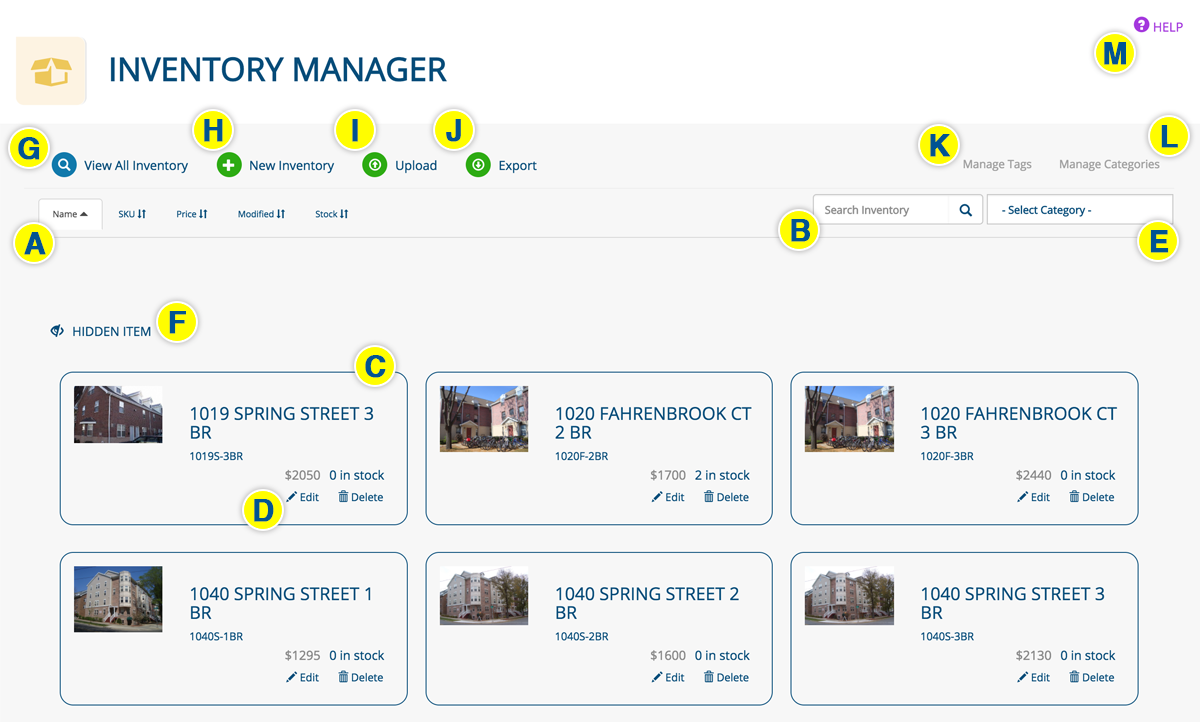
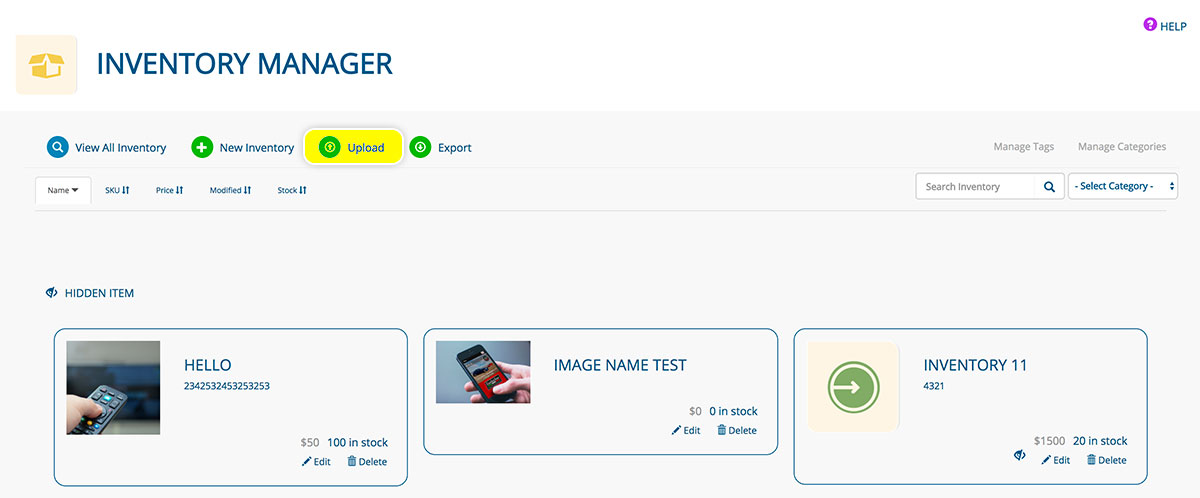
- The Inventory Manager home page contains a grid of all of your inventory, which you can sort (A) and search (B). (The default sort is item name.)
- Each listing (C) tells you the name, SKU, price, number in stock, and whether it is hidden, and gives you the option to edit or delete an item by clicking the appropriate icons (D). You also can edit an item by clicking it.
- Select an option from the SELECT CATEGORY dropdown menu (E) to access a specific set of inventory items.
- The HIDDEN ITEM icon (F) indicates inventory that has been hidden from public view on your website
- Return to this page by clicking VIEW ALL INVENTORY (G) from any page within the app.
- Get started on a NEW INVENTORY item (H)
- UPLOAD a spreadsheet containing an updated inventory record (I)
- EXPORT a spreadsheet containing a record of your inventory (J)
- Create, edit and delete tags (K)
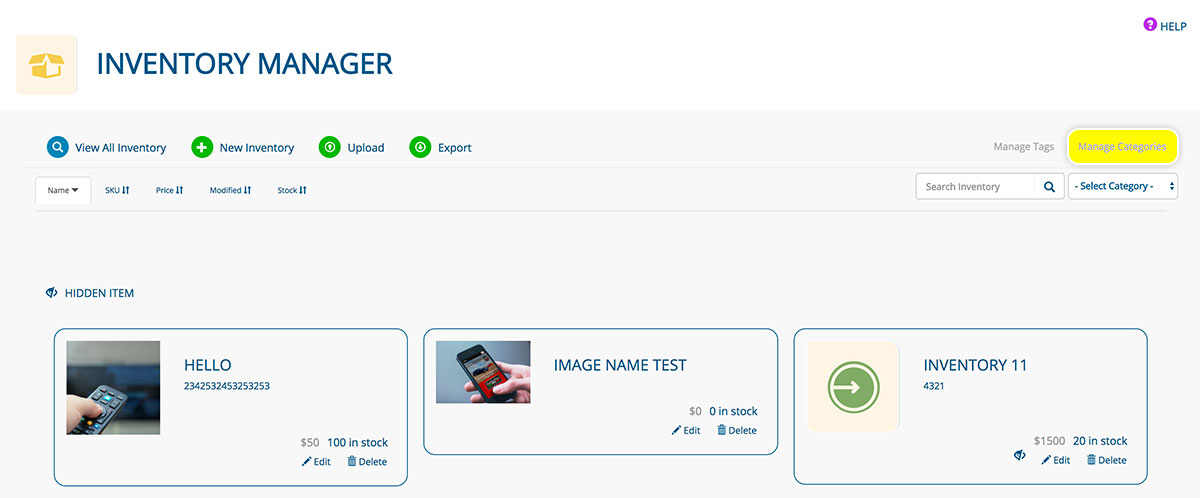
- Create, edit and delete categories for your inventory (L)
- Read documentation on the Inventory Manager app (M)
NEW INVENTORY
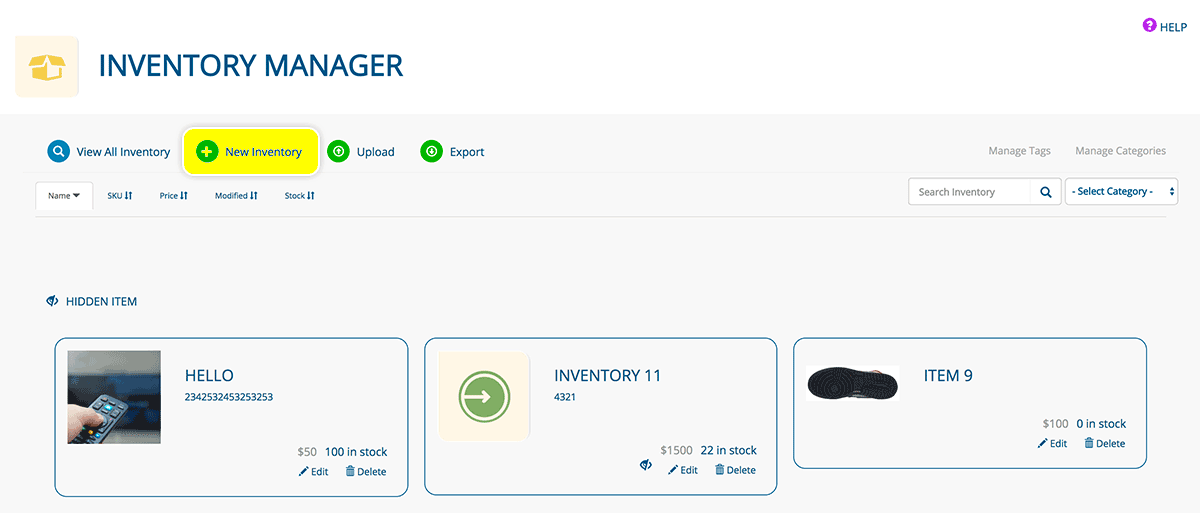
- Click NEW INVENTORY from any page in the Inventory Manager app.
CREATING/EDITING INVENTORY
ON-PAGE NAVIGATION
- Quickly jump among sections on an inventory page by using the navigation:

GENERAL
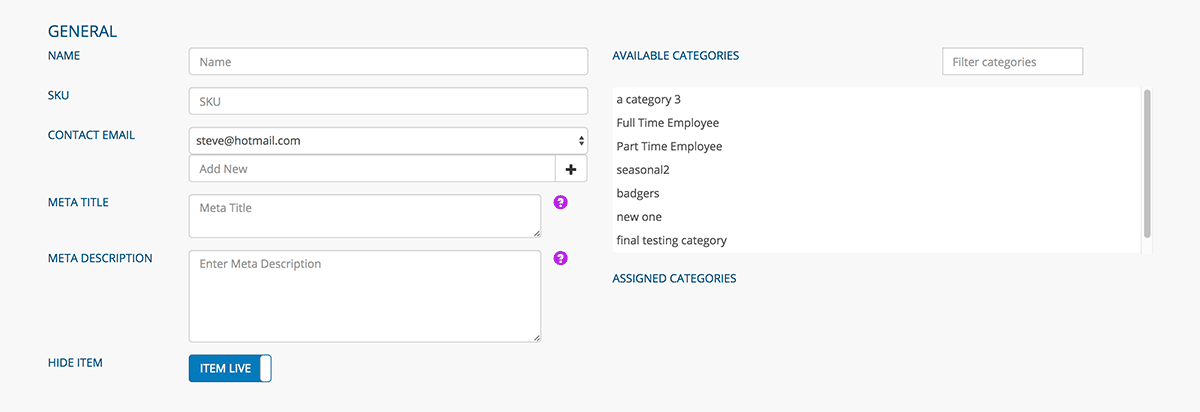
- Assign the inventory item a NAME and SKU
- Select an option from the CONTACT EMAIL dropdown menu, or add a new email address and click the + icon.
Example: Bosch 19-inch ICON Wiper Blade; X7DD8KL; donsauto@gmail.com
- Enter a META TITLE and META DESCRIPTION. A well-written meta title will help boost the inventory item page's SEO, while a sound meta description can entice a user to visit the page to learn more about the item. LEARN MORE
Example: Bosch Wiper Blades; The Bosch 19-inch ICON model's exclusive fx dual rubber resists heat and ozone deterioration and is proven to last up to 40% longer than other premium wiper blades.
- Keep the HIDE ITEM in its default ITEM LIVE position to publish the inventory item. Click it to hide the item from public view.

- Click an item from the AVAILABLE CATEGORIES field to assign it to the inventory item; it will move to the ASSIGNED CATEGORIES field. Click an item from the ASSIGNED CATEGORIES field to unassign it.
Example: Windshield Wipers
ITEM INFO
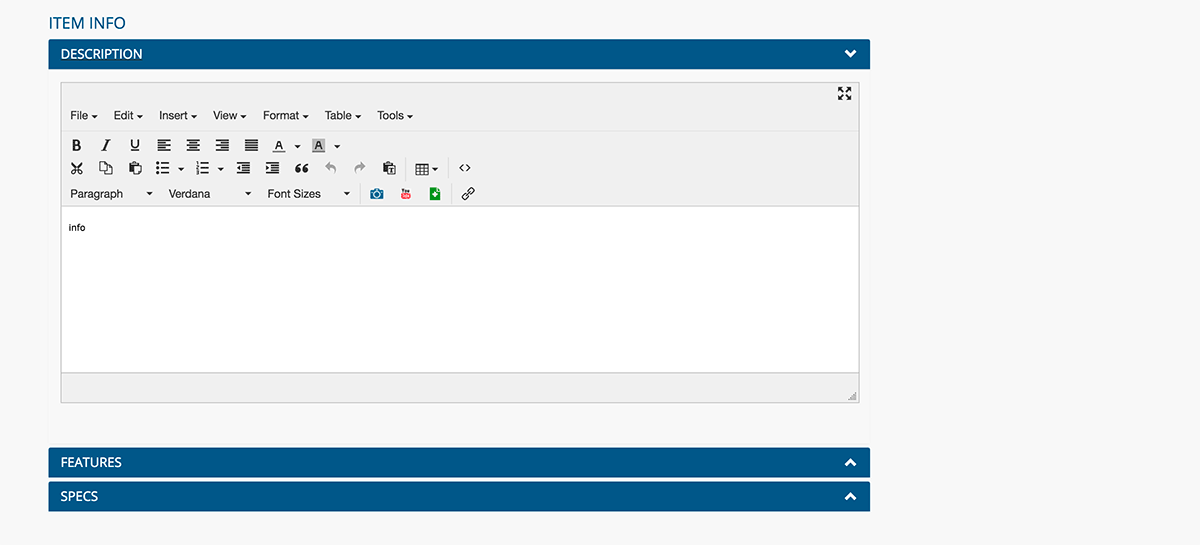
- Click each respective blue bar to reveal the page editor to enter the DESCRIPTION, FEATURES and SPECS
- Write a general DESCRIPTION of the inventory item
Example: “Exclusive fx dual rubber resists head and ozone deterioration and is proven to last up to 40% longer than other premium wiper blades”
- The FEATURES and SPECS for your inventory items will vary depending on the execution of your website
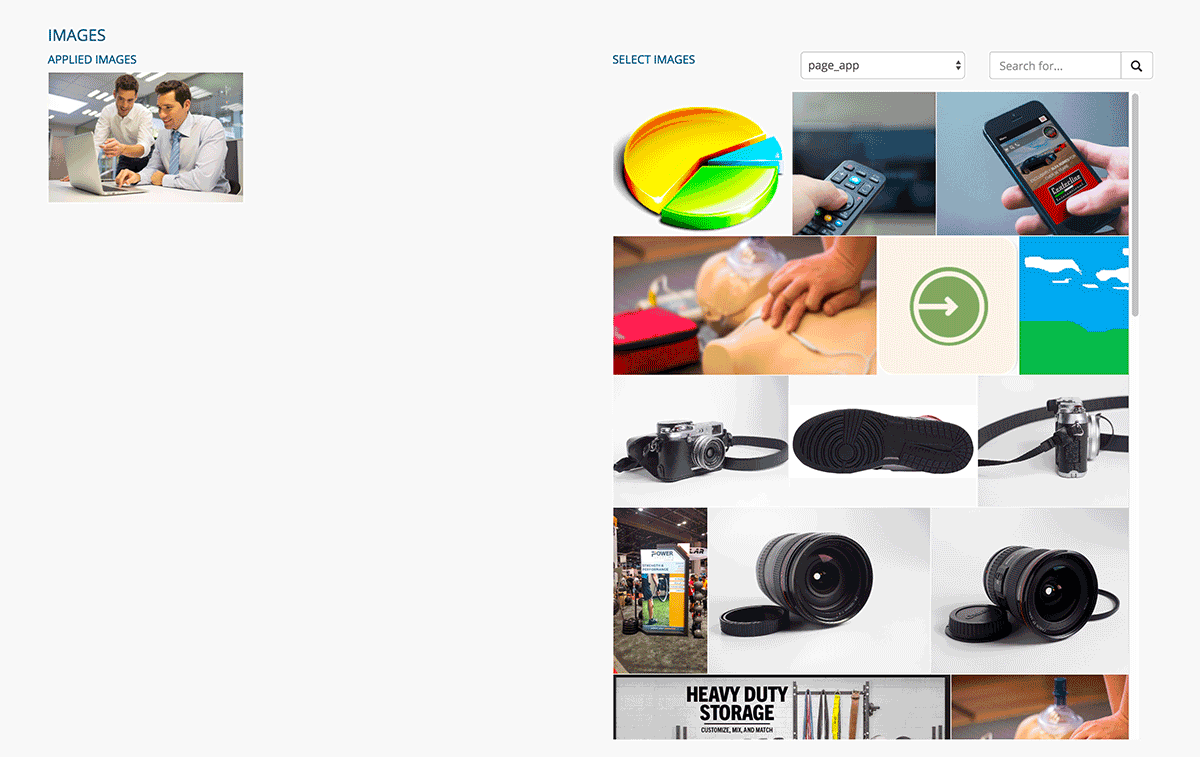
IMAGES
- Select the appropriate folder from the dropdown menu that contains an image or images for this inventory item
- Click an image in the SELECT IMAGES field to apply it to the inventory item; it will move to the APPLIED IMAGES field
- To remove an image, hover over it in the APPLIED IMAGES field and click the “x” icon
- Drag and drop images in the APPLIED IMAGES field to reorder them
PRICES & DETAILS
- If you are selling your inventory, enter the PRICE RANGE of the product or, if there is a specific price for the product, enter it in the ALT PRICE field
- Enter the inventory item's size, if pertinent, in the DIMENSIONS field (this feature can be used for different purpose depending on the execution of your website)
- If applicable, enter the inventory's LOCATION. Make an entry in the field below and click the + icon to create a new location. Enter the item's specific ADDRESS.

OPTIONS
The Options feature generally is used to apply a secondary set of images/graphics, but its purpose likely will be specific to your site
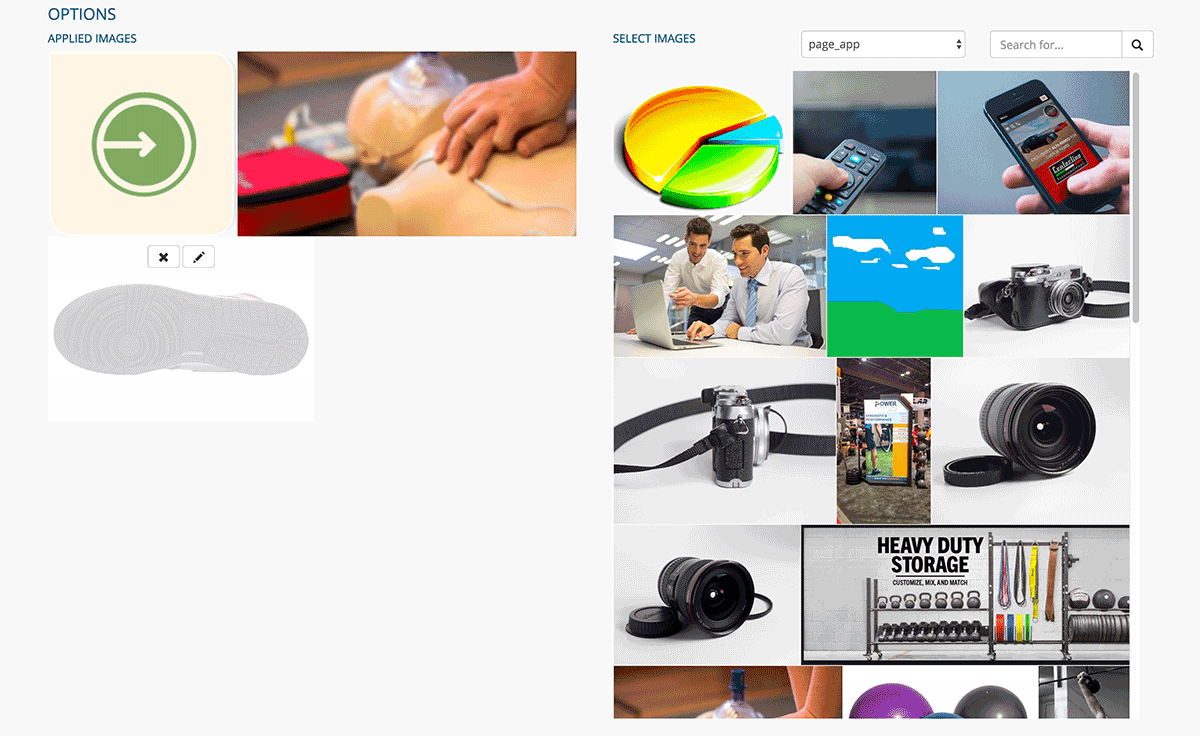
- Select the appropriate folder from the dropdown menu that contains an image or images for this inventory item option
- Click an image in the SELECT IMAGES field to apply it to the inventory item option; it will move to the APPLIED IMAGES field
- To remove an image, hover over it in the APPLIED IMAGES field and click the “x” icon
- Drag and drop images in the APPLIED IMAGES field to reorder them
- Hover over an image in the APPLIED IMAGES field and click the pencil icon to edit option details
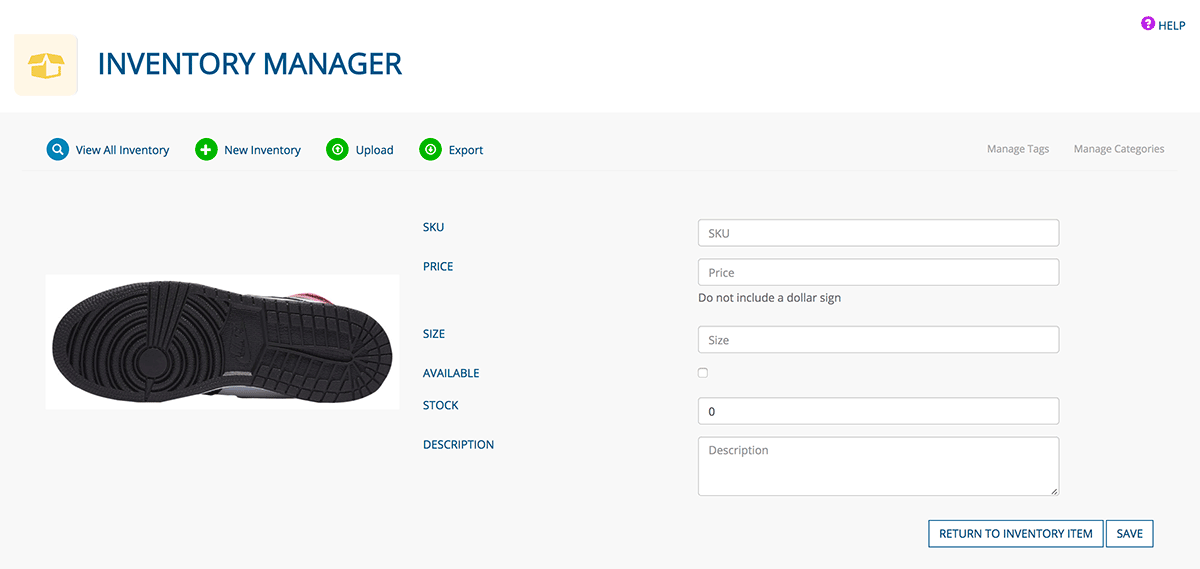
- Enter the option SKU, PRICE, and SIZE, indicate whether it's AVAILABLE, the number in STOCK, and write a DESCRIPTION.
- Click the SAVE button. Click RETURN TO INVENTORY ITEM to go back.
TAGS
- Click a tag in the AVAILABLE TAGS field to assign it to the inventory item. Click a tag in the ASSIGNED TAGS field to unassign it.
- In the FILTER TAGS, OR ADD NEW field, start typing to filter tags. Type a tag title then click the + icon to add a new tag. ABOUT TAGS

- Click the SAVE button when you are finished creating/editing your inventory item, or the DELETE button to delete it.
NAVIGATING AMONG ITEMS
- Every inventory page contains a dropdown menu for easy access to other inventory items

CREATING/EDITING A CATEGORY
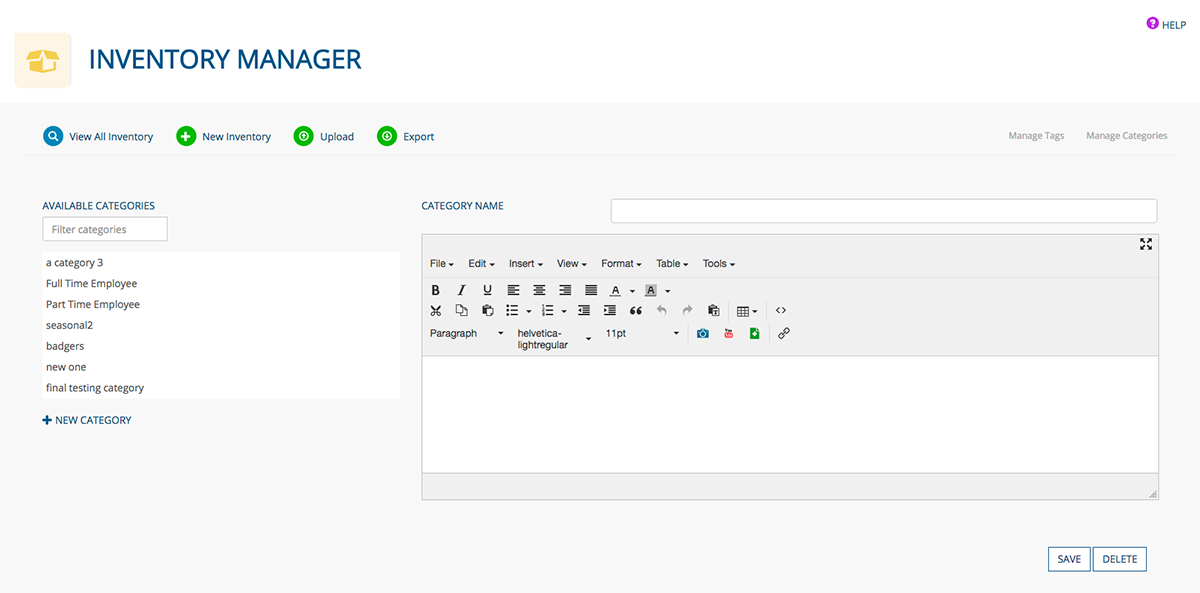
- Click the MANAGE CATEGORIES button from any page in the Inventory Manager
- Enter the CATEGORY NAME (example: windshield wiper blades) and, in the page editor, the category description (if applicable)
- Select an item from the AVAILABLE CATEGORIES list to edit it
- Click NEW CATEGORY to create another category
- Click the SAVE button when you are finished creating/editing your category, or the DELETE button to delete it.
CREATING/DELETING TAGS
- Click the MANAGE TAGS button from any page in the Inventory Manager app
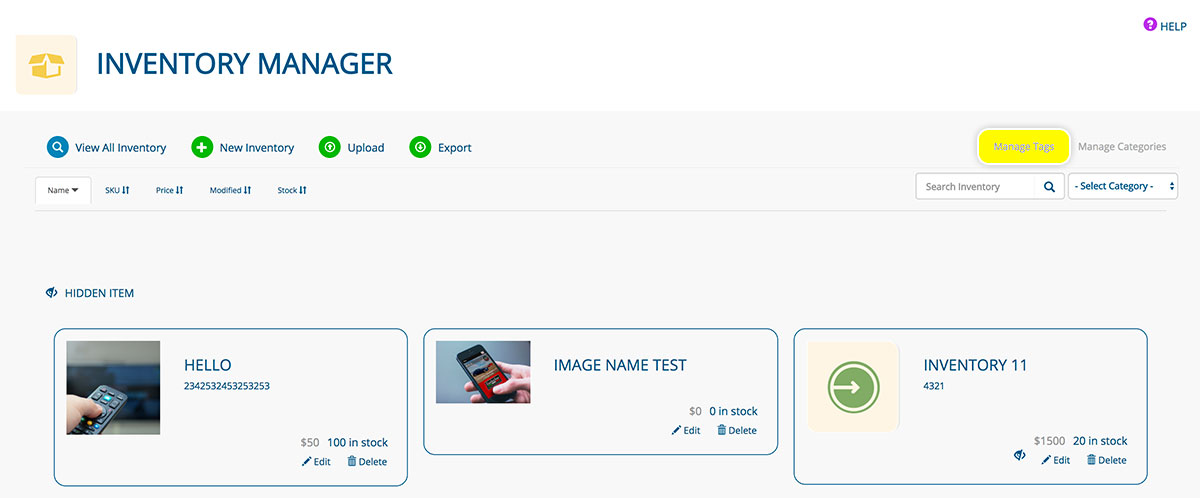
- In the FILTER TAGS, OR ADD NEW field, start typing to filter tags. Type a tag title then click the + icon to add a new tag.
- Click a red 'x' to delete a tag ABOUT TAGS

UPDATING INVENTORY
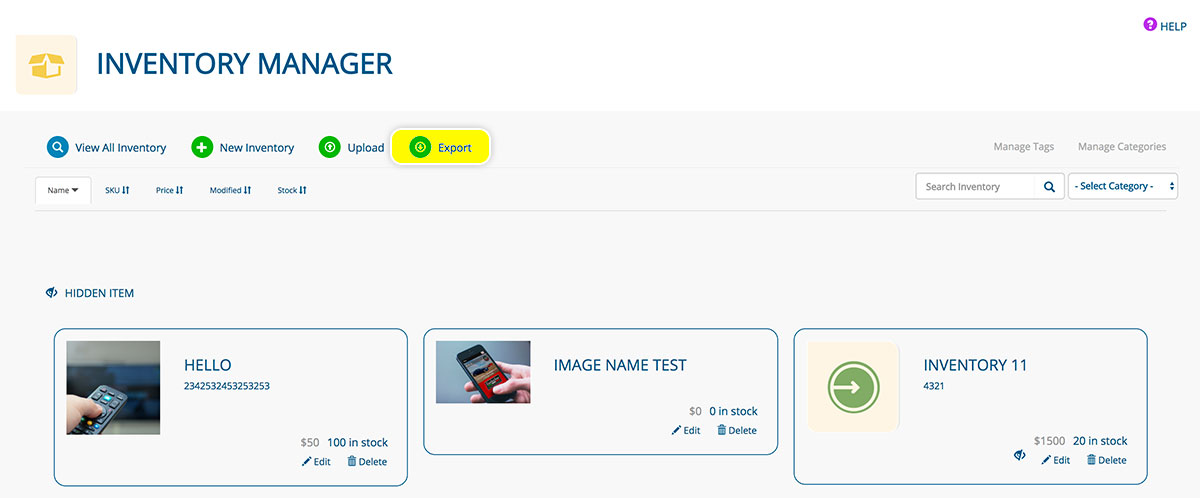
- Click the EXPORT button from any page in the Inventory Manager app
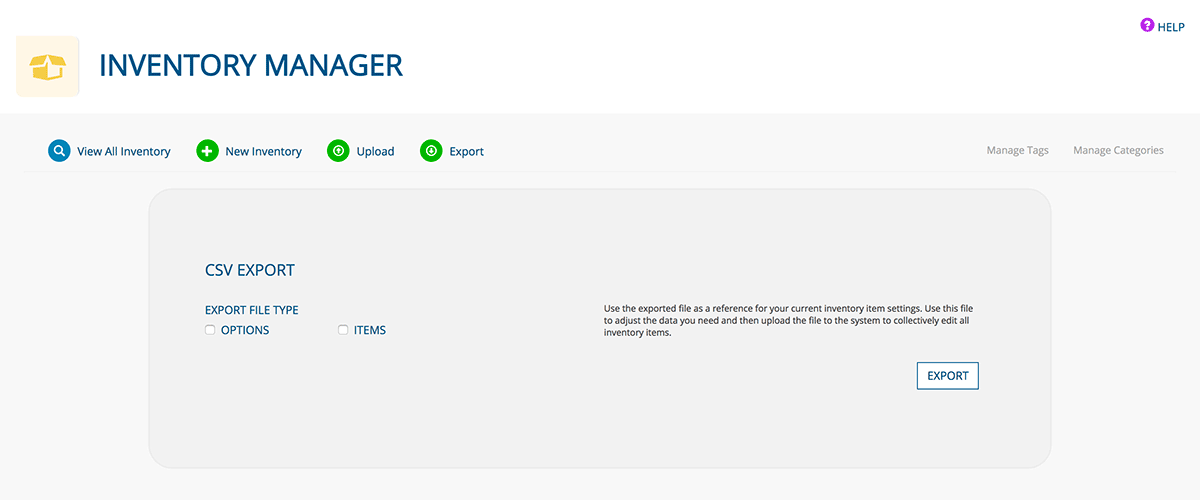
- Choose whether to export OPTIONS or ITEMS by clicking the appropriate checkbox.
- Click the EXPORT button
- A Excel spreadsheet will be downloaded to your computer. Open it, make edits to the file (do not make changes to the ID or ITEM_ID columns, and do not change the name of the file) and save it.
- Click the UPLOAD button from any page in the Inventory Manager to upload your edited Excel spreadsheet
- Select whether you are uploading OPTIONS or ITEMS by clicking the appropriate checkbox
- Click the CHOOSE FILE button to pull up your computer's file navigator
- Find the updated Excel spreadsheet on your computer and click the OPEN button
- Click UPLOAD
- The changes you made should be reflected in the app
