APPS
File Manager
 Visit the File Manager app by selecting it in the app menu or by visiting the Dashboard and selecting it there. Use this app to make files available for download to your website users.
Adding a file to a content block
HOME PAGE
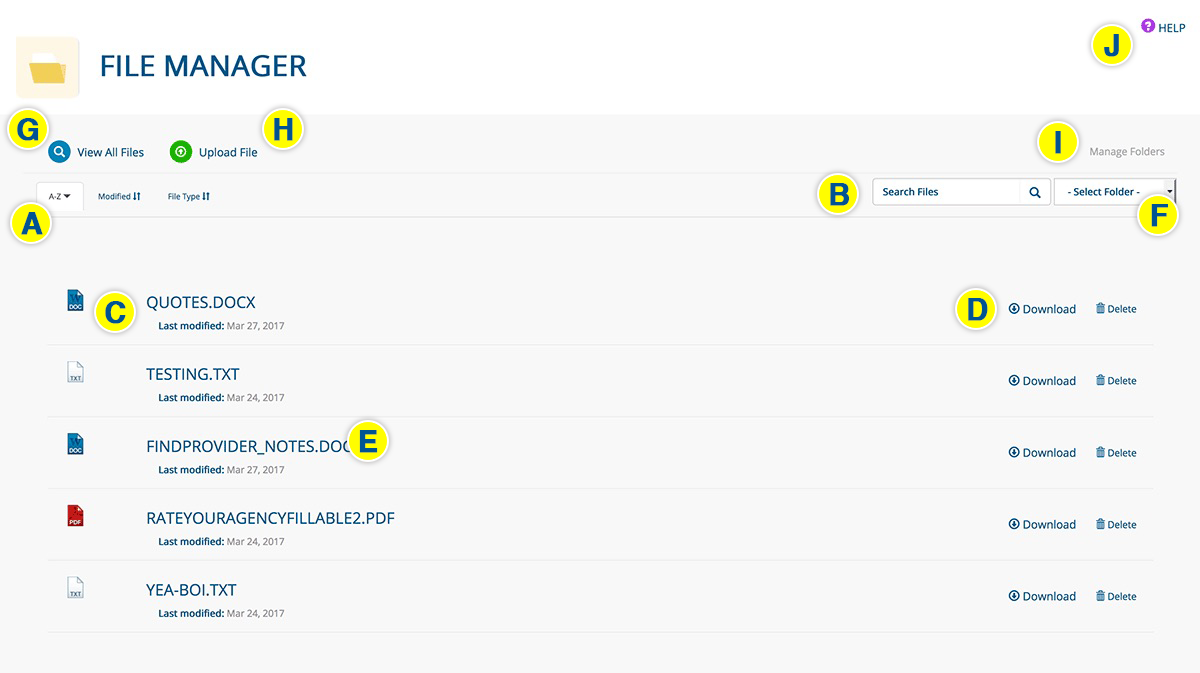
- The File Manager home page contains a list of all of your files, which you can sort (A) and search (B). (The default sort is alphabetical.)
- Each listing (C) tells you the date the file was last modified, and an icon identifies the file type.
- Download or delete a file with the icons (D) at the far right. You also can download a file by clicking its title (E).
- Select an option from the SELECT FOLDER dropdown menu (F) to access a specific set of files.
- Return to this page by clicking VIEW ALL FILES (G) from any page within the app.
- Upload a new file (H)
- Create a folder to better organize your files (I)
- Read documentation on the File Manager app (J)
UPLOADING A FILE
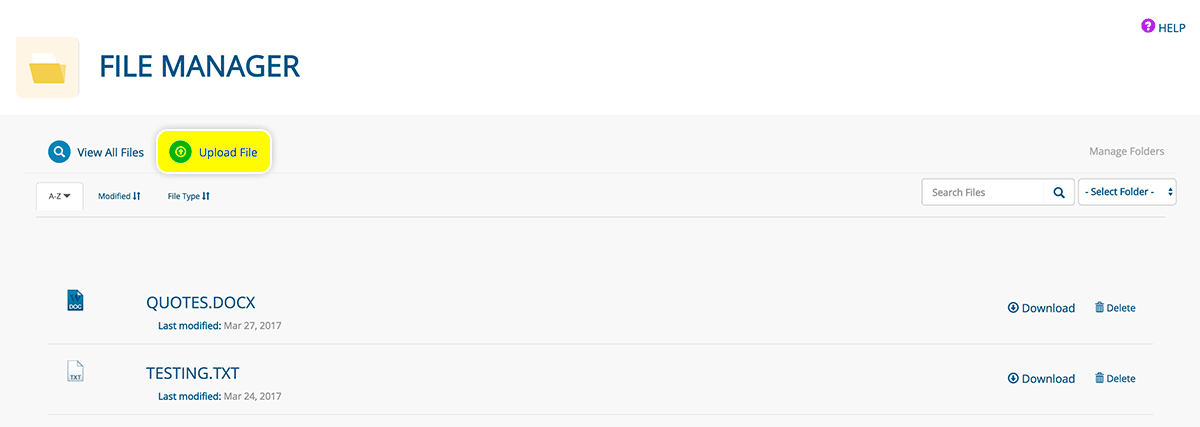
- Click UPLOAD FILE from any page in the File Manager app.
- Select the folder you want to upload your file to from the dropdown menu
- Drag the file(s) for upload from your computer to the DRAG YOUR FILES HERE icon
OR
- Click the BROWSE button to pull up your computer’s file navigator
- Click the file you would like to upload (shift+click to choose multiple files)
- Click OPEN
- Click the UPLOAD FILES button
- You should receive a notice indicating a successful upload, and the file(s) will appear in the designated folder

You also can upload a file directly from a content block:
- Click the pencil icon of the content block you would like to add a file to
- Click the green file icon in the page editor
- Choose the folder where you would like to upload the file to from the UPLOAD NEW FILE dropdown menu
- Click the BROWSE button to pull up your computer’s file navigator
- Click the file you would like to upload (shift+click to choose multiple files)
- Click OPEN
- Click the UPLOAD button

FILE UPLOAD GUIDELINES
- The following are acceptable file formats for upload: .pdf, .doc, .docx, .txt. .rtf, .csv, .xls, .zip, .rar
- The maximum file size allowed is 6MB
CREATING A NEW FOLDER
Folders help you organize your files
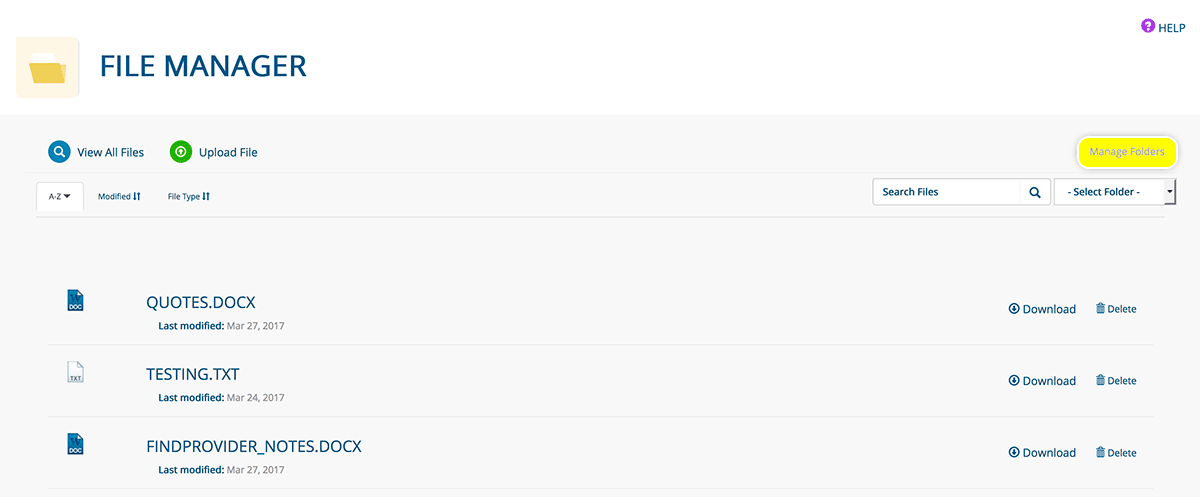
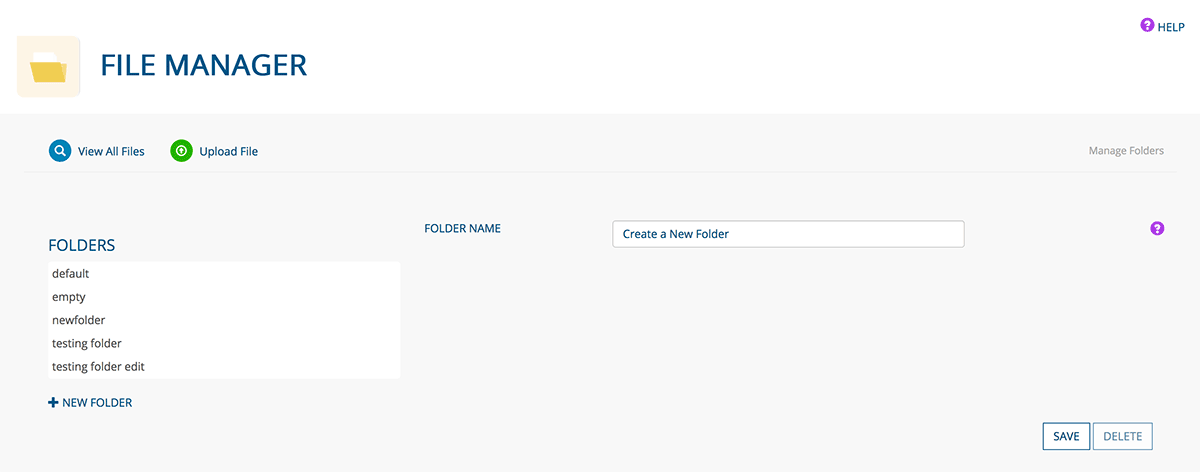
- Click the MANAGE FOLDERS button from any page in the File Manager app
- Enter the FOLDER NAME
- Click NEW FOLDERto add another folder
- A folder only can be deleted if it is empty, because deleting a folder containing files would delete the files as well
- A folder name cannot be edited because doing so would break links to these files on your website
- Click the SAVE button when you are finished creating your folder, or the DELETE button to delete an empty folder
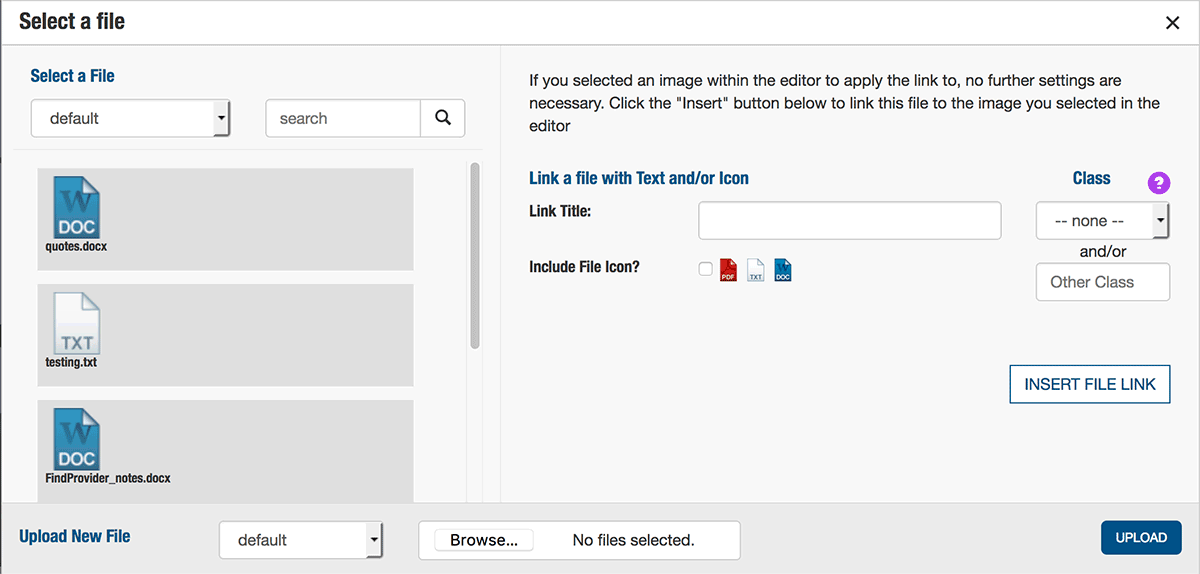
ADDING A FILE TO A CONTENT BLOCK
- Click the pencil icon of the content block you want to add an image to
- Click the green file icon
- Choose the folder in which your file exists from the SELECT A FILE dropdown menu; search files from the search bar
- Select the file you would like to make available for download from the list by clicking the icon
- Enter the text to display in the LINK TITLE field
- Click the INCLUDE FILE ICON checkbox to include a file icon with your link (optional)
- If you are linking your file with an image (select the image in the page editor then click the green file icon), choose a CLASS (optional) from the dropdown menu (apply a second class by typing it in the field below the dropdown)
- “100% width” sets the width of the image to 100% so that it fills the entire width of the content block (recommended)
- "Snapshot" can be set to a pre-determine style specific to your site
- “Polaroid” adds a white border to the image
- “Rounded” rounds the corners of the image
- “Glow” adds a shadow to the image
- “Coupon” adds a dashed line around the image
- Click the INSERT FILE LINK button
Was this page helpful? Leave your comments below.
comments powered by Disqus