EDITING CONTENT
Using the Page Editor
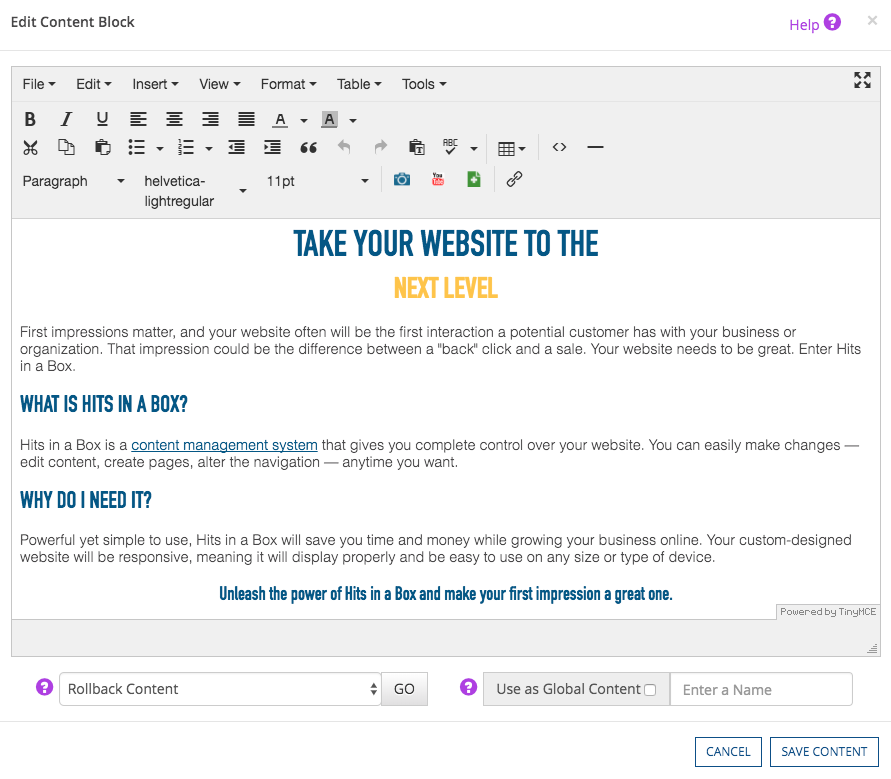
The page editor is accessed by hovering over a text block and clicking the pencil icon. It functions much the same as Microsoft Word or other word processing applications. The page editor is used to create, edit, and delete written content, images, and graphics on your web pages.

WORKING WITH IMAGES

Click to add an image to a content block or to upload an image (also found under the "Tools" menu > "Gallery"). To edit an existing image in a content block, click on it then the blue camera icon.
ADDING AN IMAGE
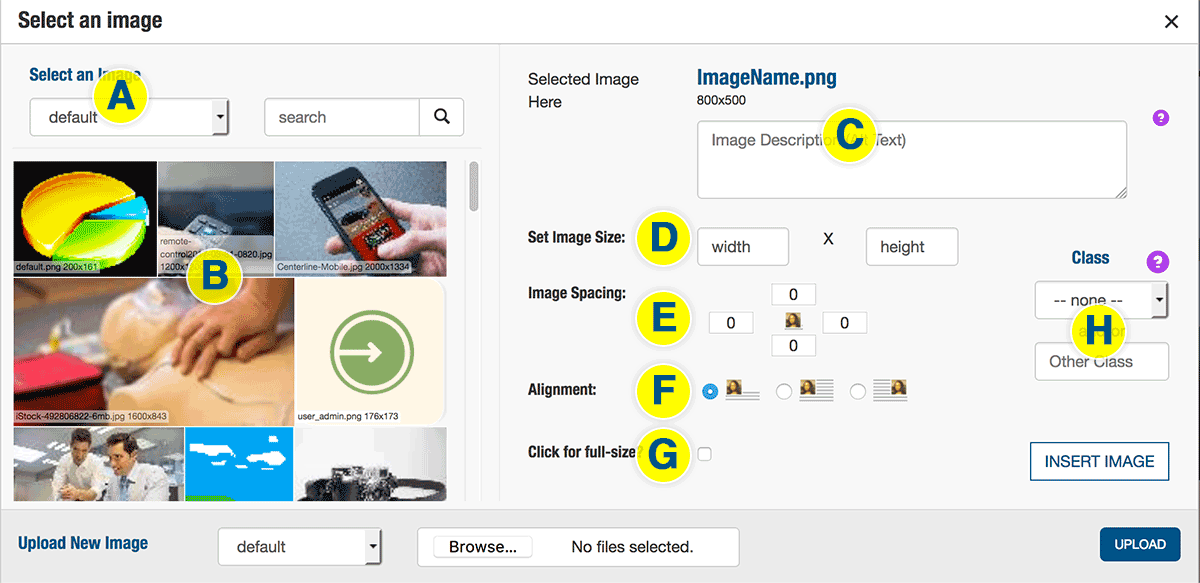
- Choose the folder (A) that contains the image you want to insert from the dropdown menu under the SELECT AN IMAGE header; search images from the search bar to the right.
- Click the desired image (B).
- Enter a description (C) of the image. Learn about LEARN ABOUT ALT TAGS.
- SET IMAGE SIZE (D); set the width (in pixels) in the first field, and the height in the second field automatically will scale proportionally
- Set IMAGE SPACING (E) around the image (provides space between text and the image; 10 is a good starting point)
- Set the ALIGNMENT of the image (F; from left: text starts below the image; text wraps around to the right of the image; text wraps around to the left of the image)
- Check the CLICK FOR FULL-SIZE checkbox (G) if you want the image to be its original size
- Choose a CLASS (H; optional) from the dropdown (apply a second class by typing it in the field below the dropdown)
- “100% width” sets the width of the image to 100% so that it fills the entire width of the content block (recommended)
- "Snapshot" can be set to a pre-determine style specific to your site
- “Polaroid” adds a white border to the image
- “Rounded” rounds the corners of the image
- “Glow” adds a shadow to the image
- “Coupon” adds a dashed line around the image
- Click the INSERT IMAGE button; the image will appear in the page editor

UPLOADING AN IMAGE
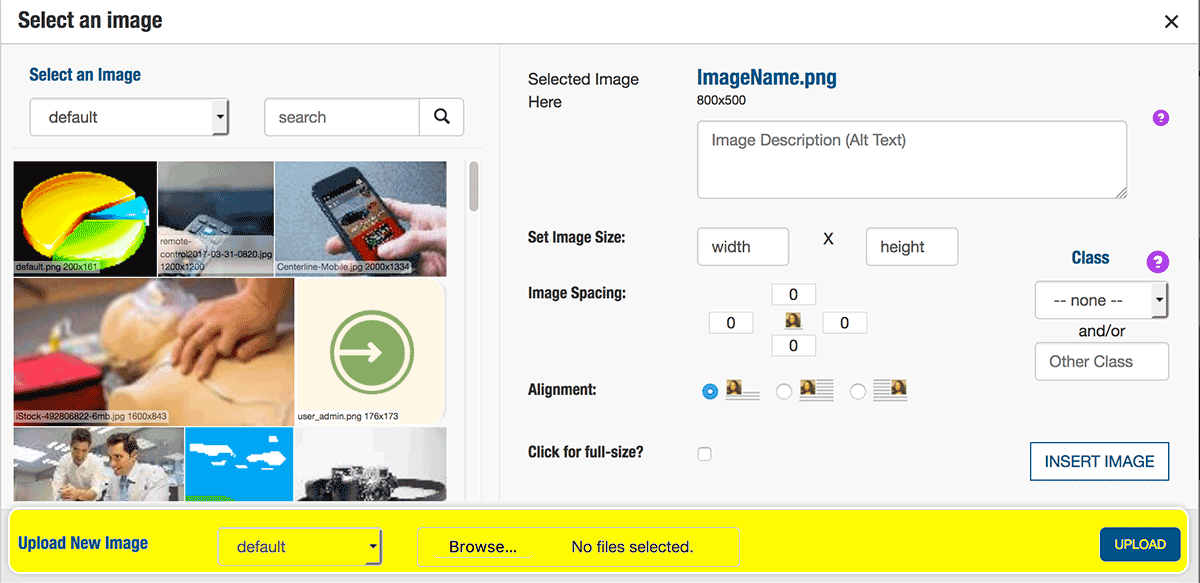
- Choose the upload destination from the UPLOAD NEW IMAGE dropdown menu
- Click the BROWSE button
- Click the image located on your computer that you want to upload (shift-click to upload multiple images)
- Click the UPLOAD button

STYLING/FORMATTING TEXT

- Bold, italicize, and underline text (also found under the “Format” menu)
- Access the “Format” menu to style text with strikethrough, superscript, subscript, and to clear formatting

- Left-align, center, right-align, and justify text (also found under the “Format” menu > "Formats" > "Alignment")

- Apply color to text, apply background color to text; you can include your brand colors as options from the Site Config app

- Cut, copy, or paste content (also found under the “Edit” menu)

- Paste as text (this feature is toggled on and off by clicking the icon; also found under the “Edit” menu)

- Change the font style (it is recommended you not change this setting; styles for your site have been set within the H1-H6 headings.)

- Change the font size

- Creates a blockquote

- Decreases/increases amount of text indent
SPELLCHECK

Click to initiate the spellcheck process. Click a misspelled word to view options (also found under the "Tools" menu)
UNDO/REDO

- Undo/redo your most recent action (also found under the “Edit” menu)
LISTS

- Create an unnumbered list or a numbered list
SOURCE CODE

- Allows access to HTML. ONLY USES THIS FEATURE IF YOU ARE WELL-VERSED IN CODING HTML. (also found under the “Tools” menu)
HEADINGS

- Use these to style your headings. MORE ON HEADINGS (also found under the “Format” menu > "Format "> "Headings")
ADDING YOUTUBE VIDEO

- Enter the video URL and a width (enter 100% to make the video the full width of your text block) and height
- Click the “OK” button
ADDING A FILE FOR DOWNLOAD

(Also found under the “Tools” menu)
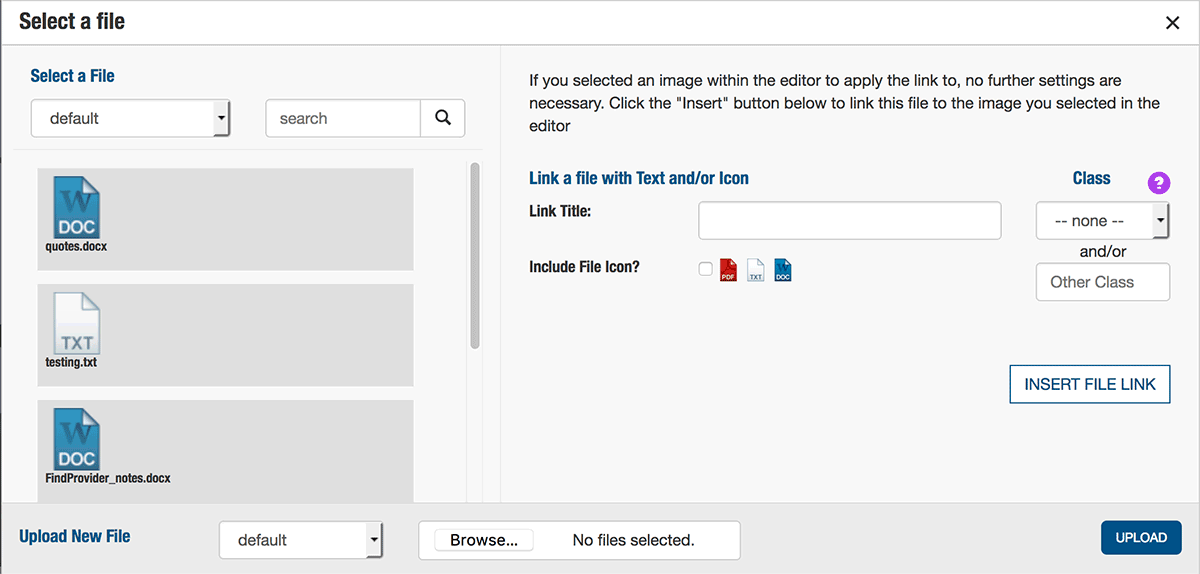
- Choose the folder in which your file exists from the SELECT A FILE dropdown menu; search files from the search bar
- Select the file you would like to make available for download from the list by clicking the icon
- Enter text in the LINK TITLE field
- Click the INCLUDE FILE ICON checkbox to include a file icon with your link (optional)
- If you are linking your file with an image, choose a CLASS (optional) from the dropdown menu (apply a second class by typing it in the field below the dropdown)
- “100% width” sets the width of the image to 100% so that it fills the entire width of the content block (recommended)
- "Snapshot" can be set to a pre-determine style specific to your site
- “Polaroid” adds a white border to the image
- “Rounded” rounds the corners of the image
- “Glow” adds a shadow to the image
- “Coupon” adds a dashed line around the image
- Click the INSERT FILE LINK button

LINKS

(Also found under the “Insert” menu)
- Add the URL, link text to display, and link title
- Choose the target (“None” takes the user to the page within the same browser window; “New window” opens a new browser window)
- Choose the link type from a set of pre-styled choices
- Click the “OK” button
LINES

- Adds a horizontal line used to separate content (also found under “Insert” menu)
SELECT ALL
- Select Control-A (Command-A on a Mac) or go to the "Edit" menu > Select All to select all content in the page editor
INSERT DATE/TIME
- Go to the "Insert" menu > "Insert date/time"
ANCHOR LINKS
- Go to the "Insert" menu > "Anchor"
FULL-SCREEN VIEW

- Provides a full-screen view of the page editor (or go to the "View" menu > "Fullscreen"). Click again to collapse the page editor to its original position.
GLOBAL CONTENT

- Mark the checkbox and enter a name if you would like to have the ability to apply the page editor's current content elsewhere on your site. LEARN HOW TO APPLY GLOBAL CONTENT
ROLLBACK

- Select the dropdown to view the last 10 saved versions of this text block. Click the ROLLBACK CONTENT button to restore the selected version.
Was this page helpful? Leave your comments below.
comments powered by Disqus